GPIOs:
GPIO is an ancronym for General Purpose Input Output. GPIO is mainly been named for ARM architectural input output pins. Now for using these pins on ARM processor is quite tough as there are many usage of single pin for many different purposes. For example, usage of ALE signal for separating Address and Data from the same multiplexed Address and Data Bus in many general purpose processors like 8085,x86, etc.
In Raspberry Pi there’s a separate connector of 13x2 pins labeled as GPIO. Here we can get most of the communication related pins such as,
- RxD, TxD for RS232 Communication
- SDClk, SData for I2C Communication/Protocol
- MOSI, MISO, CE0, CE1, SCLK for Serial Peripheral Interface
These can be easily implemented. For example if you want to make a project that displays data from some I2C IC we can directly use it using some isolation*.
There are 17 GPIO pins (out of total 26) Out of these 17 we can use 6 GPIO pins for exclusively I/O purposes rest are been shared with pins I mentioned earlier.
So for small applications like interfacing LEDs or some LCD related projects you can use this. But if you are planning some big things like interfacing Keypad, TouchScreen, etc. you may need an Arduino Interfaced with Raspi.
Now we talked enough about this GPIO we can implement this using Python. But the question is HOW!!.
The answer is we can use this GPIOs to be used as Input/Output which is defined by importing the module named RPi.GPIO
For Raspi Embedded Linux is been providing great resource and usage documentation for almost everything starting from SD card setup to making it a Webserver. Just we need to connect them in a way to proceed for an Application.
I have made an application to display Date and Time with the total Data Transfer on Raspi since boot + a greet message.
So for any application you will make a Python File (with extension .py).
Let’s use for simple LED example. To know how a RPi.GPIO module works
Step 1:
Update and Upgrade the system:
For best results I recommend using Raspbian (Debian Variant) so just type-in following commands.
sudo apt-get update
sudo apt-get upgrade
Step 2:
After upgrading check the version of RPi.GPIO installed on Raspi. To do the same open Python as root and import it and type in GPIO.version
sudo python
import RPi.GPIO as GPIO
GPIO.VERSION
Version should be around 0.5.4.
Step 3:
If every thing is good try to make a file named newfile.py to do so we will make a new file.
mkdir ~/gpio
cd ~/gpio
nano newfile.py
Editor will open up type in following commands for importing GPIO module.
import RPi.GPIO as GPIO
This will let us to use setmode and setup functions of GPIO.
Step 4:
Now we will move forward for defining a GPIO pin as input or output and also which numbering system to use for accessing the pins.
GPIO.setmode(GPIO.BCM)
GPIO.setup(23, GPIO.OUT)
Consider that you have connected the LED(+ve) to pin 23 and other to ground through 470Ω resistor
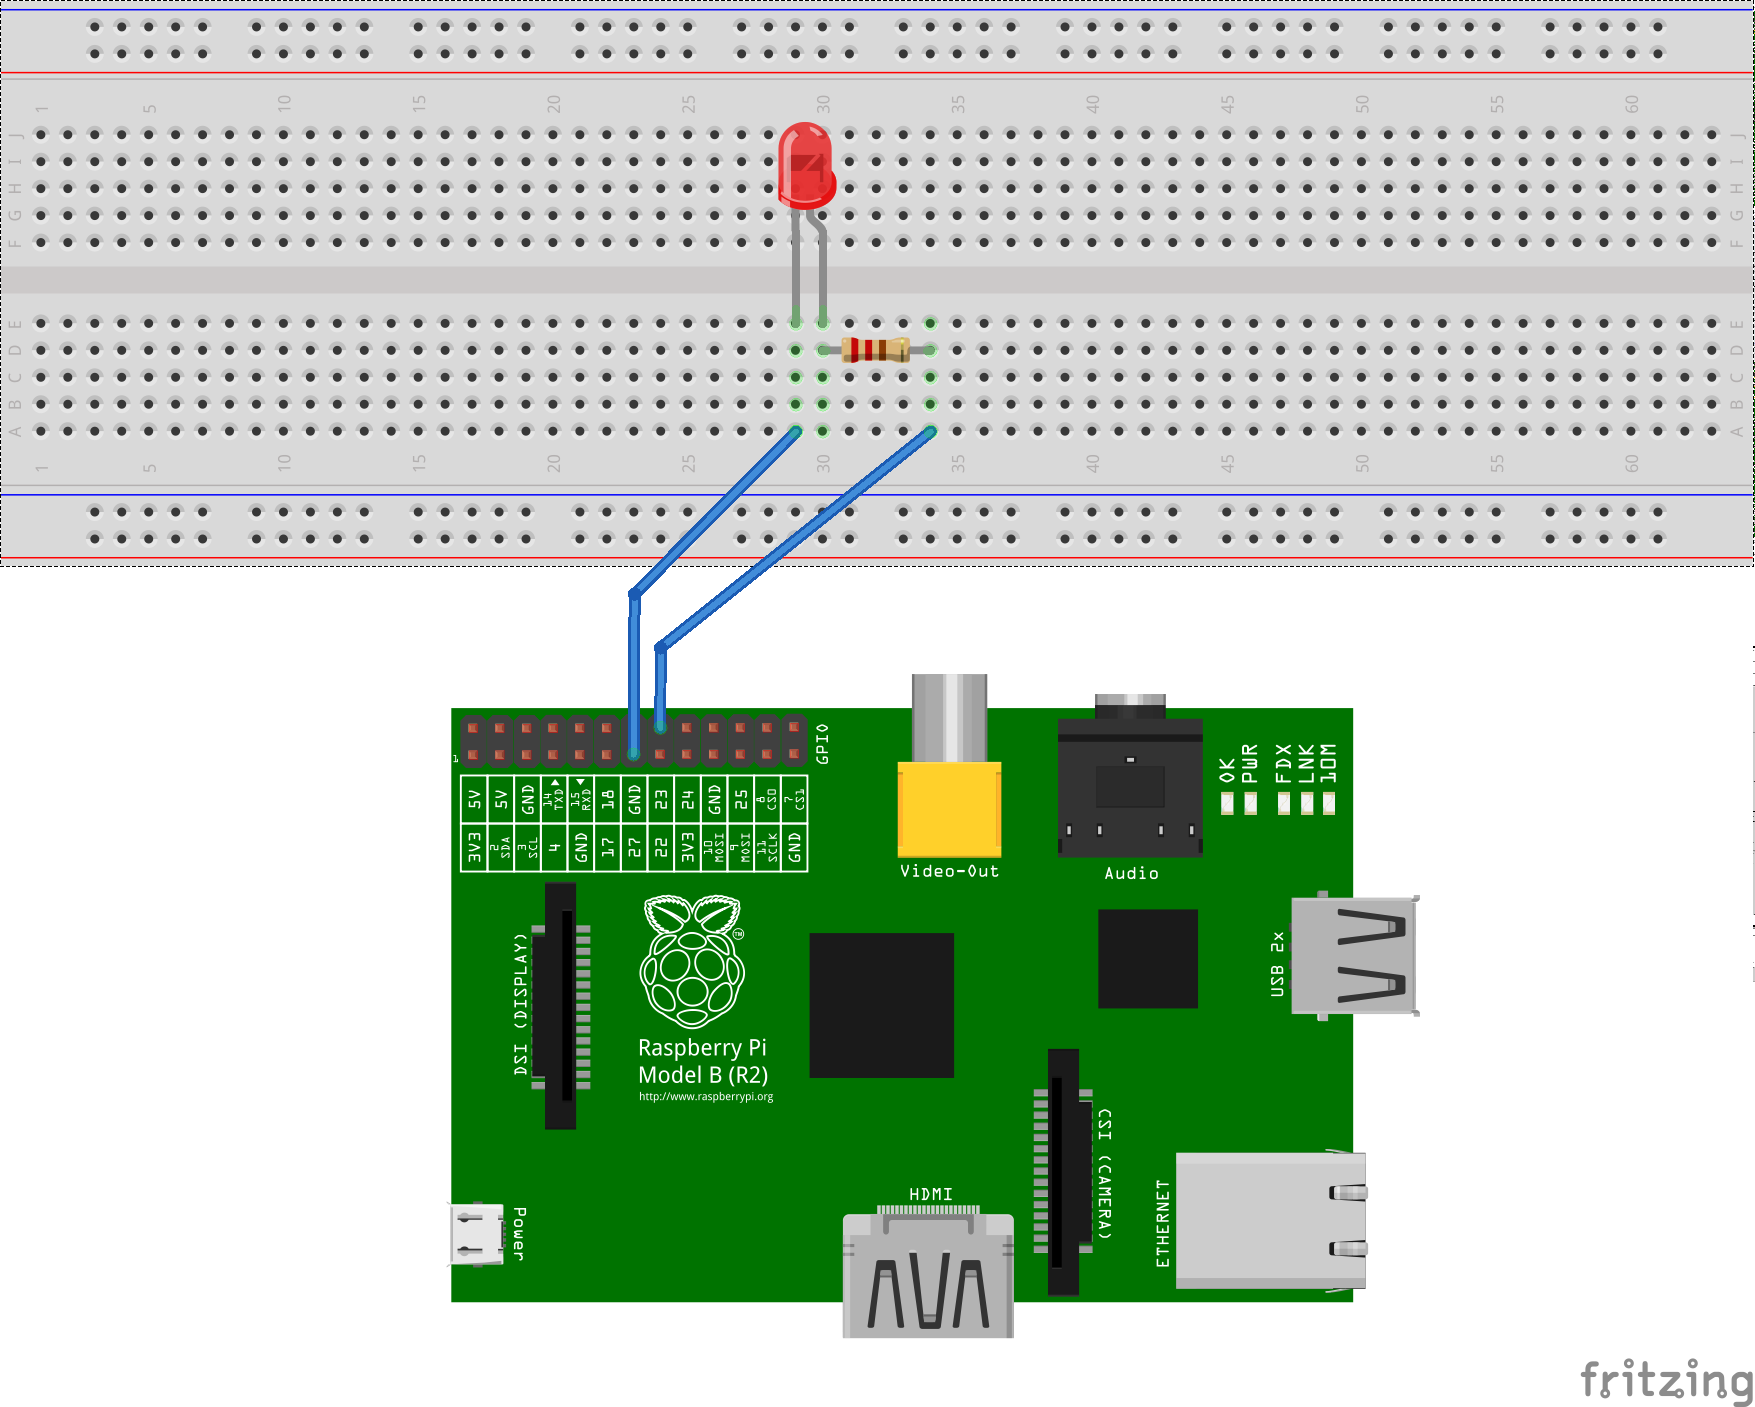
So now this code says you have declared the Pin 23 as Output and as we have connected the LED to pin 23. This is just the declaration part now we need to make use of it.
Now lets say when we execute the python script with argument “ON” like python newfile.py ON
Step 5:
After Setting up we need to do execution i.e. the function as a script.
The logic here is to turn the LED on or off depending upon the argument given i.e. sudo python newfile.py ON will turn it ON and sudo python newfile.py OFF will turn it OFF. But if none is in input it will blink the LED 10 times saying as an error.
CODE:
from time import sleep
import sys

argmnt=str(sys.argv[1])			#Fetching First Argument
def main():						#MAIN Function
	import RPi.GPIO as GPIO
	GPIO.setmode(GPIO.BCM)
	GPIO.setup(23,GPIO.OUT)
	if argmnt.upper() == "ON" or argmnt == '1':
		GPIO.output(23,True)
	elif argmnt.upper() == "OFF" or argmnt == '0':
		GPIO.output(23,False)
	else:
		for i in range(0,10):
			GPIO.output(23,True)
			sleep(1)
			GPIO.output(23,False)
			sleep(1)


if __name__== '__main__':
	main()
That is the code. You can find this at DCPrimeRPi Repo.
End of Post